Introduction
In the world of cycling, tracking performance is crucial for improvement and achieving personal goals. A bike computer can be an invaluable tool that provides real-time data about your rides, helping you understand your performance metrics and make informed decisions for training. In this article, you will learn how to effectively use a bike computer for performance tracking, covering everything from setup to interpreting your data.
Step 1: Choosing the Right Bike Computer
Before you can start tracking your performance, you need to select a bike computer that fits your needs. Here are some factors to consider:
- Functionality: Decide if you need basic features like speed and distance tracking or advanced metrics such as heart rate monitoring and GPS navigation.
- Compatibility: Ensure the bike computer is compatible with your bike type and any existing sensors you might have.
- Connectivity: Look for options that can sync with mobile devices or apps for enhanced data analysis.
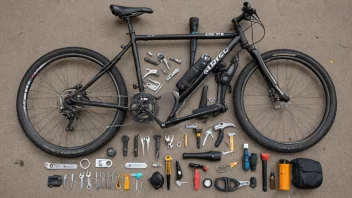
Step 2: Installing the Bike Computer
Once you have your bike computer, the next step is installation. Follow these steps:
- Mount the Computer: Choose a location on your handlebars that is easily visible while riding. Use the provided mounting bracket to secure it in place.
- Install Sensors: If your bike computer requires sensors (like speed or cadence sensors), follow the manufacturer's instructions to attach them to your bicycle wheels and crank.
- Power On: Turn on the bike computer and ensure it is functioning correctly.
Step 3: Configuring Your Bike Computer
Before hitting the road, you need to configure your bike computer:
- Input Personal Data: Enter your weight, height, and any other personal metrics that the bike computer may require for accurate calculations.
- Set Preferences: Adjust settings for units of measurement (metric or imperial), display preferences, and alerts.
- Connect to Apps: If your bike computer has Bluetooth or Wi-Fi capabilities, connect it to your smartphone or cycling app for data syncing.
Step 4: Using the Bike Computer During Rides
Now that your bike computer is set up, it's time to use it during your rides:
- Start Tracking: Begin your ride and activate the tracking feature. Make sure to monitor your speed, distance, and time.
- Pay Attention to Metrics: Use the real-time data to adjust your pace and effort. For instance, if your heart rate is too high, consider slowing down.
- Utilize Alerts: Many bike computers have customizable alerts for speed, cadence, or heart rate, helping you stay within your performance targets.
Step 5: Analyzing Your Performance Data
After your ride, it’s essential to analyze your performance data for improvement:
- Sync Data: Sync your bike computer with your mobile app or computer to download your ride data.
- Review Metrics: Examine key metrics such as average speed, total distance, elevation gain, and time. Look for patterns or areas for improvement.
- Set Goals: Based on your data analysis, set specific, measurable goals for your next rides.
Step 6: Keeping Your Bike Computer Maintained
To ensure optimal performance from your bike computer, maintenance is key:
- Regular Updates: Check for software updates regularly to ensure you have the latest features and bug fixes.
- Battery Management: Monitor battery life and replace batteries as needed to avoid interruptions during rides.
- Cleaning: Keep the screen and sensors clean to ensure accurate readings.
Conclusion
Using a bike computer for performance tracking can significantly enhance your cycling experience. By following the steps outlined in this article, you can effectively set up and utilize this technology to reach your cycling goals while ensuring safety. Remember to continually analyze your performance data, set new goals, and maintain your bike computer for optimal performance. Happy cycling!